

Totally tapa: Installing Ngatu tā’uli 2011
Tapa cloths are usually much smaller than the Gallery’s work Ngatu tā’uli 2011. Its size required a specialised installation technique and system that could address its unique properties and needs.
Following on from our previous post, conservation staff were key additions to the large team installing the Ngatu tā’uli tapa for the exhibition ‘Threads: Contemporary Textiles and the Social Fabric’. The tapa is not only enormous but it is also very heavy. The challenge was to provide overall support to the art work with as little intervention as possible — the display ramp and plinth design took this into account.
The first step in the three day installation was to prepare the display plinth, ramp and wall over which the tapa would be draped. A layer of thin foam and cotton flannelette fabric was attached to the top of the plinth and ramp to provide support to the tapa over a large surface area. Numerous strips of soft fabric were sewn together before the tapa arrived; the weave and fibres of the flannelette fabric gently but effectively grab the surface of the tapa without the use of adhesives. Foam and flannelette were also attached to the curved support at the top of the wall, preventing the art work from moving or slipping.

Covering the domed support on top of the wall with foam and flannelette / View full image
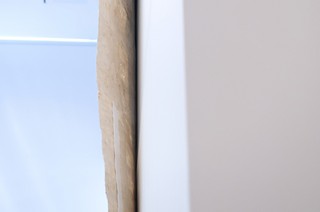
Velcro strips were stapled to the edges of the ramp to attach to the paper and velcro hinges on the back of the art work. The velcro was attached to the ramp in a horizontal orientation, while the velcro on the tapa itself was adhered in a vertical direction. This was to allow some flexibility where two sides of the velcro would meet.

Horizontal strips of Velcro on the display ramp / View full image
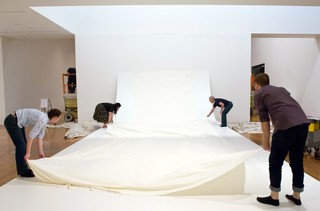
The second phase of the installation was unrolling the art work onto the plinth. Care was taken to measure the position of the tapa on the plinth at the beginning of the process, because it would be very difficult to adjust it once it was fully unrolled.

Measuring the position of the tapa as the installation begins / View full image
Once the roll reached the wall, it needed to be lifted up using two scissor lifts on each side of the wall so that it could be further unrolled up the wall, which was a slow process. The roll was heavy, so Workshop staff made special cradles to hold it on the lifts while it was being installed. It was important for them to rise simultaneously to keep the art work horizontal at all times.

A custom-made cradle to hold the rolled tapa on scissor lifts during installation / View full image

The art work being installed, with scissor lifts either side / View full image

The tapa was lifted over the wall and passed to a second set of staff on scissor lifts on the other side / View full image

Unrolling the tapa on the other side of the wall / View full image

Unrolling the tapa on the other side of the wall / View full image
Once the work was installed, there was some sagging and bulging that needed to be addressed. Tapa cloths are entirely handmade and so have slightly irregular dimensions, which can result in mild undulations. In this case, the vertical flat surface of the wall didn’t allow for these undulations and gave the appearance of bulges. Conservation staff decided to add some additional paper and velcro hinges to the work to provide more support, and to even out the surface appearance.

Conservators attached hinges in situ using the scissor lifts. Tables with materials and equipment had to be set up on each lift in order for conservators to attach extra hinges.

Conservators attaching hinges in situ / View full image

Conservators attaching hinges in situ / View full image
Because the work couldn’t be laid flat while the new hinges were being attached, small conservation-grade irons were needed to dry the adhesive quickly while making sure the bond of the hinge to the tapa was strong. Conservation irons have very small heads and the temperature can be accurately controlled.

Using a conservation-grade iron to attach the paper and velcro hinges to the tapa / View full image
The bulges were gradually worked out of the surface as the hinges were attached to the velcro on the wall behind the tapa.

Securing the extra hinges to the wall / View full image
The final step was to insert the flat Perspex bar into the casing at the end of the tapa to help it hang flatter. Adjustments often need to be made once an art work is installed for display, so the conservator’s role does not end once the work leaves the Conservation laboratory.

A conservator inserting the flat Perspex bar into the paper casing / View full image

The tapa lays flat but still retains some natural undulations / Photographs: N Harth © QAGOMA / View full image
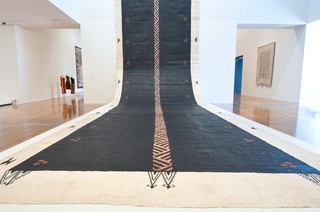
Kulupu Falehanga‘i Teleiloa, New Zealand/Tonga est. 2010 / Ngatu tā’uli 2011 / Koka (pigment from koka tree) and black commercial paint on Hiapo (paper mulberry) barkcloth / 2215 x 420cm / Commissioned 2011. QAG Foundation / Collection: Queensland Art Gallery | Gallery of Modern Art / © The artists / View full image
Liz Wild is Conservator (Sculpture), QAGOMA